Back to the manuals overview
Device: Siemens-Gigaset-C470IP
Manual: Siemens Gigaset C470IP for use with CheapConnect.
About the CP470IP:
Lets you make calls both over the landline network and (affordably) over the internet (VoIP) without a PC
Before each call, you can use a button to choose whether to call
over the landline network or the internet.
Up to six handsets can register with your base station.
Your base station can handle two simultaneous VoIP calls and one call over the landline network at the same time.
For more information see https://www.gebruikershandleiding.com/Siemens-Gigaset-C470-IP/handleiding-5-38941.html
Connecting it:
Connect the base station to your router with a network cable and plug the adapter into the mains.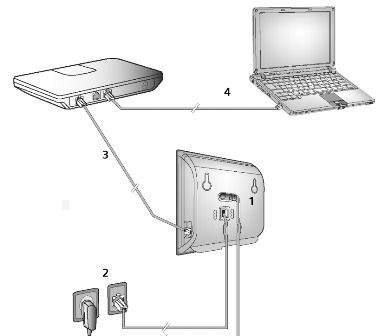
IP address:
On the handset, go to Settings -> Base -> Local network
and enter the PIN (default is 0000). The handset now shows the base station's local IP address. Enter this in your web browser as the address — in my case, 192.168.1.105
The IP address can also be found by first entering your router's IP address in the browser and looking up the IP address assigned to the C470IP.
After entering the IP address, the welcome screen appears where you log in and can choose your language.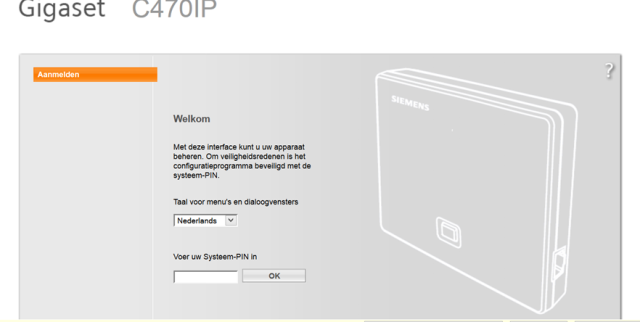
Enter your system PIN and click OK (default PIN is 0000)
You'll then land on a menu screen, choose Settings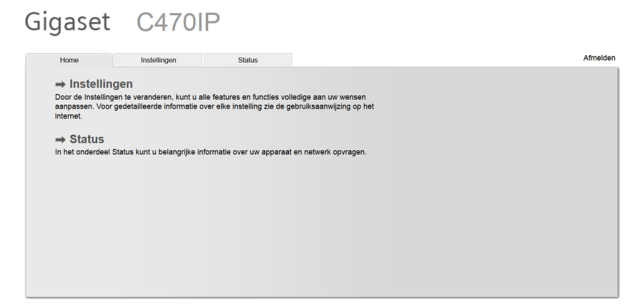
On the settings screen you have the choice:
Local network
Telephony
Message
Services
Handsets
Miscellaneous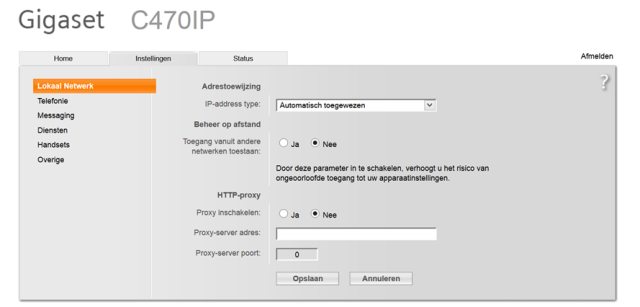
Now click Telephony and the following submenus appear under the telephony menu:
Connections
Sound
Assign number
Forwarding
Call preparation
Voicemail
Advanced settings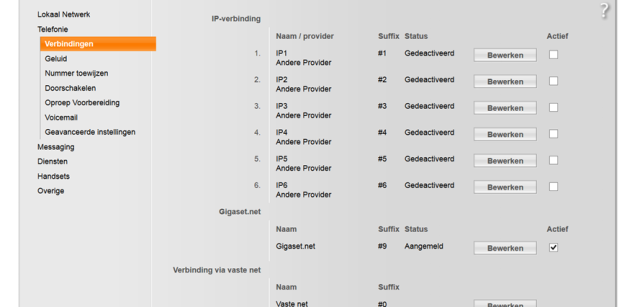
You're now in the Connections submenu
Here you can program 6 different VoIP providers.
Click edit next to IP1 and fill in the details below.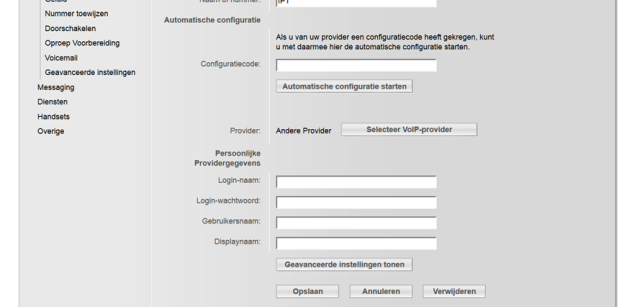
For name or number you can enter your name, provider name, phone number, etc. — I chose CheapConnect.
For login name and username enter the phone number you purchased from CheapConnect, e.g. 77707005239.
For login password enter the password associated with your CheapConnect account number, e.g. wachtwoord123.
For display name you can enter your name or phone number.
Now click Show advanced settings, a few more fields will follow.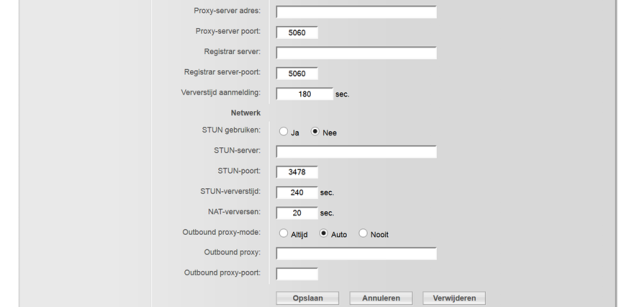
For Domain, Proxy server address and Registrar server enter: sip.cheapconnect.net
For Registration refresh time enter: 500. Value must be between 300 and 3600
Then click save.
You'll return to the Connections screen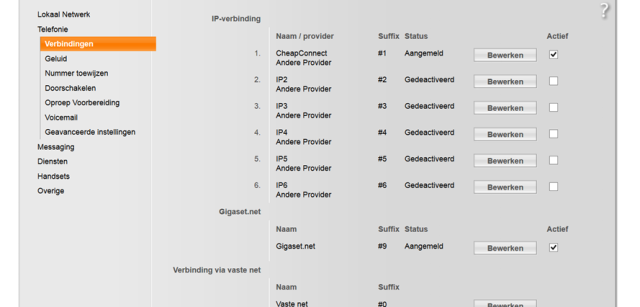
Check that the Active field next to IP1(CheapConnect) is checked
If everything is filled in correctly, you're now connected to CheapConnect.
Now click Sound and check the fields against the data below:
Allow only 1 VoIP call check no.
Voice quality check preference for own codec.
Volume for VoIP calls check normal.
Selected codecs Here I chose to add all available codecs. CheapConnect's codec preference is 1: G.711A (alaw), 2: G.729A/B
Don't forget to click save after making changes.
Then click Assign number and check the fields against the data below: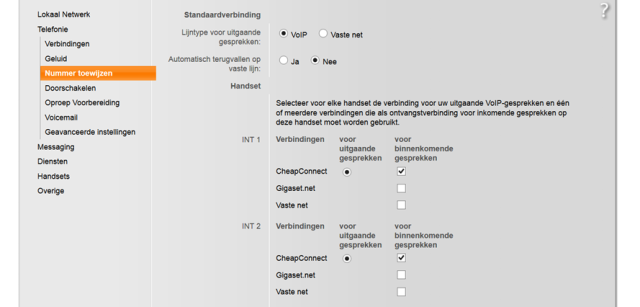
Outbound call line type check VoIP.
Automatically fall back to landline check no
Depending on the number of handsets, check the provider for outgoing calls and incoming calls for each handset here. In our case, both outgoing and incoming CheapConnect.
Don't forget to click save after making changes.
Then go to Advanced settings and check the data below.
Transmit settings check Sound.
Use the R key, etc. check yes.
Transfer call by hanging up check no.
Preferred Refer To check Target's contact info.
Automatic Refer To check no.
Use random ports check no.
SIP port 5060
RTP port 10000-20000
Don't forget to click save after making changes.
For further settings, refer to the manual, see https://www.gebruikershandleiding.com/Siemens-Gigaset-C470-IP/handleiding-5-38941.html
Good luck

